What If Disasters Mega Tsunami: How to Survive the Round
How to survive the Mega Tsunami in What If Disasters, from the first announcement through waves that grow as they approach to the aftermath.
Quick answer
Get to the highest point on the map the moment the Mega Tsunami announcement plays. In the demonstrated round the first 500 m wave was mild on elevation, and the second wave kept growing as it neared land — heights and announcements vary between rounds, so plan for the tallest wave you can survive. Stay out of the fast water during the mega tsunami phase, and climb down as soon as it passes, before your perch collapses.
- On the announcement: start climbing while the countdown still runs.
- First wave: waist deep on high ground in the demo — and only the opener.
- Growing wave: 5,500 m in the demo, and it kept growing as it neared land — pick the tallest structure available.
- Mega phase: the fast surge drags players who are not on elevation.
- Aftermath: get off your structure before it collapses.
Mega Tsunami is one of the game's named disaster scenarios — the intro lineup describes it as “the ocean rolls back, a mega tsunami hits,” one of 25 disasters spread across nine maps (see the full disasters list). A round unfolds in phases, each announced on screen. The walkthrough below follows one demonstrated round from announcement to aftermath; wave counts and announcements can vary between rounds, so treat the exact heights as an example of what the scenario does. New to the round system? The how to play guide covers the basics.
The announcement: start climbing immediately
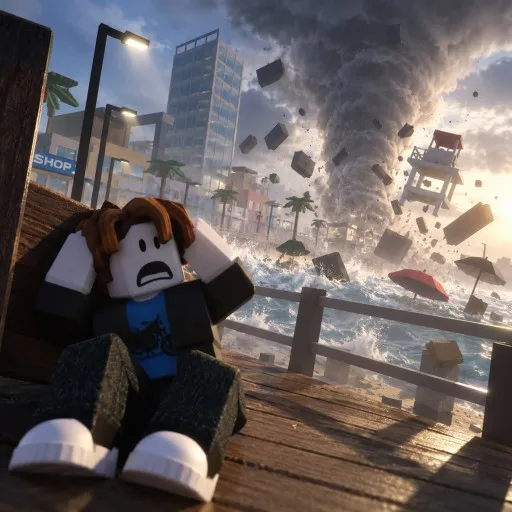
The demonstrated round opened with the on-screen announcement “What if a 500 m tsunami hit?” and a 9.1-magnitude earthquake as a precursor, with a countdown of about 20 seconds before the disaster struck. That countdown is your entire head start, and the demonstrated response is to spend it moving: head straight for the map's highest point. As one survivor put it, “There's a flood, go above the flood... We have to go higher. It's the only solution.”
Where that high point is depends on the map, and the habits below are what separate a calm climb from a late scramble:
Checklist
- Scout before the timer
The first ten seconds of map knowledge beat late scrambling — know where you are climbing before the announcement hits.
- Keep a backup route
One blocked door ends runs in flood and tsunami rounds, so have a second way up in mind.
- Check the round description
Some events punish high ground — trust the description before you trust a peak.
The demonstrated round, from the announcement onward:
First wave: a false all-clear
The first 500 m wave sounds catastrophic, but for the player already on elevation it only reached waist deep (“Waist deep only?”). The reveal came right after: that was only the first wave. Treat wave one as a false all-clear — stay on your high ground, and use the lull before the next announcement to get even higher if a taller spot is reachable.
Second wave: the growing 5,500 m wall
The second wave was announced at 5,500 m and “keeps growing as it gets closer to land,” looking taller each time it came into view. In the demonstrated round it nearly overtopped the entire map. This is the wave that decides the run, so commit to the tallest structure available — the demo player's water tower barely cleared it. Height thresholds per structure or map are not established, so the working rule is simply maximum height, chosen early. And if the obvious way up is missing — the demo player found no ladder where one was needed — improvise another ascent on the spot instead of hesitating. That quick improvisation reached safety.
Mega phase: respect the fast water
After the giant wave, the round enters its “Mega tsunami” phase. Waves are fast, most of the coast is gone, and the surge can drag players backward with it: in the demo, one player was dragged back while another who stayed on elevation was untouched. Stay clear of the fast-moving water and stay on elevation — that was the demonstrated difference between being dragged out and staying safe.
Aftermath: get down before it collapses
Riding out the wave is not the end of the round. In the demo, the structure the player had climbed began threatening to collapse once the water passed, and the player deliberately climbed down first (“I'm going to get down before this thing collapses”). Once the surge has passed, get off your perch promptly.
Where Mega Tsunami runs go wrong
Problems and fixes
Treating the first wave as the whole disaster
Suggested responseStay high — in the demonstrated round the 500 m wave was only the opener before a 5,500 m wall that kept growing.
The obvious way up is missing or blocked
Suggested responseImprovise another ascent immediately instead of searching for the route you planned.
The surge drags you backward in the mega phase
Suggested responseStay on elevation and out of the fast-moving water; that is what kept the demo player from being dragged out.
Lingering on your perch after the water passes
Suggested responseClimb down as soon as the surge has passed, before the structure collapses.
The high-ground response shows up outside the mega scenario too: in a regular (non-mega) tsunami round, players ran for high ground, hid inside a structure around 40 m up, and the water still physically shoved anyone it touched. The Mega Tsunami calls for that same response at its most extreme — in the demonstrated round, that meant topping the map's tallest structure.
Related Guides
Moon Falls
Every Moon Falls stage and the high ground that carries you from gravity crush to the moon break.
Thrill Park Map
Recognize Thrill Park by its landmarks and see how they shaped a documented earthquake round.
Disasters List
Every confirmed disaster and the hazard it brings, from the moon fall to the mega tsunami.